
Introduction
While searching for a good backup solution for my files, I found my old Ready NAS Duo v2 and thought it would be perfect for this, as it supports up to 4 TB of storage with two 3.5 inch hard drives. The only problem was that the original firmware of this device was outdated already several years ago. This would be critical security-wise for a device that is used to store partly sensitive data. So I started searching for a custom firmware which could give me the freedom I wanted for the NAS. Luckily, I found the website of a guy who ported the latest Debian to the NAS and was kind enough to post a detailed description of it. After altering the built config a bit I build the firmware for the NAS based on Debian.
The NAS got a 128 MB NAND-Flash Chip in-built which is not enough to store full Debian on it. Luckily there are still several ways to work around this. The easiest for me was putting the OS on an external USB stick with enough storage and create a cmd to autoboot from it.
Step by Step
Make sure to backup all your data before following this guide.
1. Enable UART on Raspberry PI (skip if not needed)
To give it some context why I am using a Raspberry PI and not just a TTL to USB converter for doing this you would need to check the Troubleshooting section later in this post. Some commands for unbricking the device/loading uboot onto it are just available for linux or would be tedious to install on Windows. My main operating system is Windows, hence the RPI.
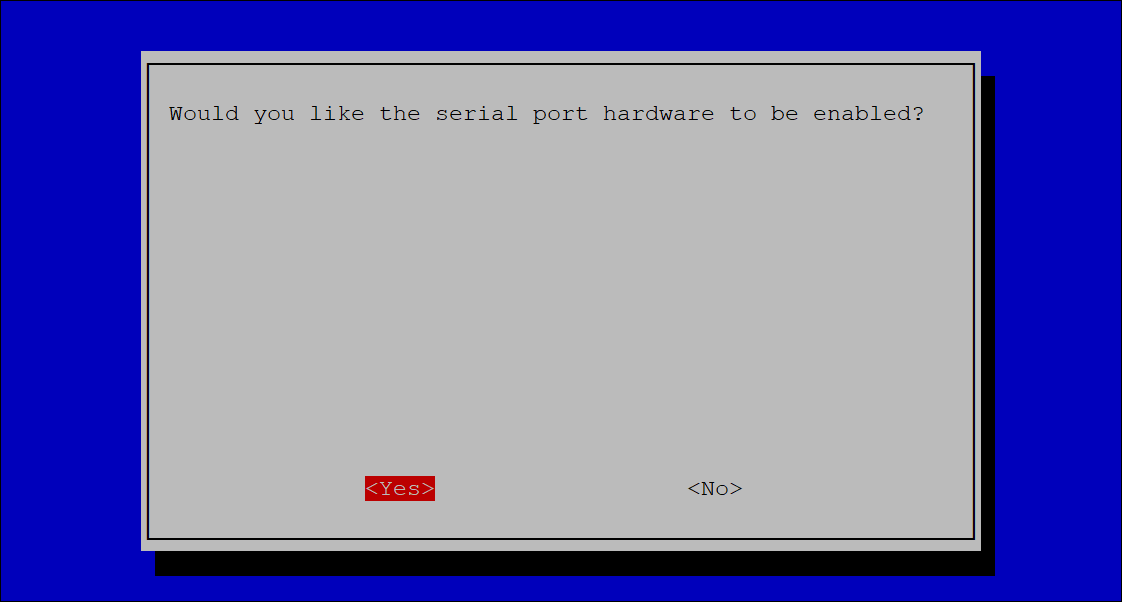
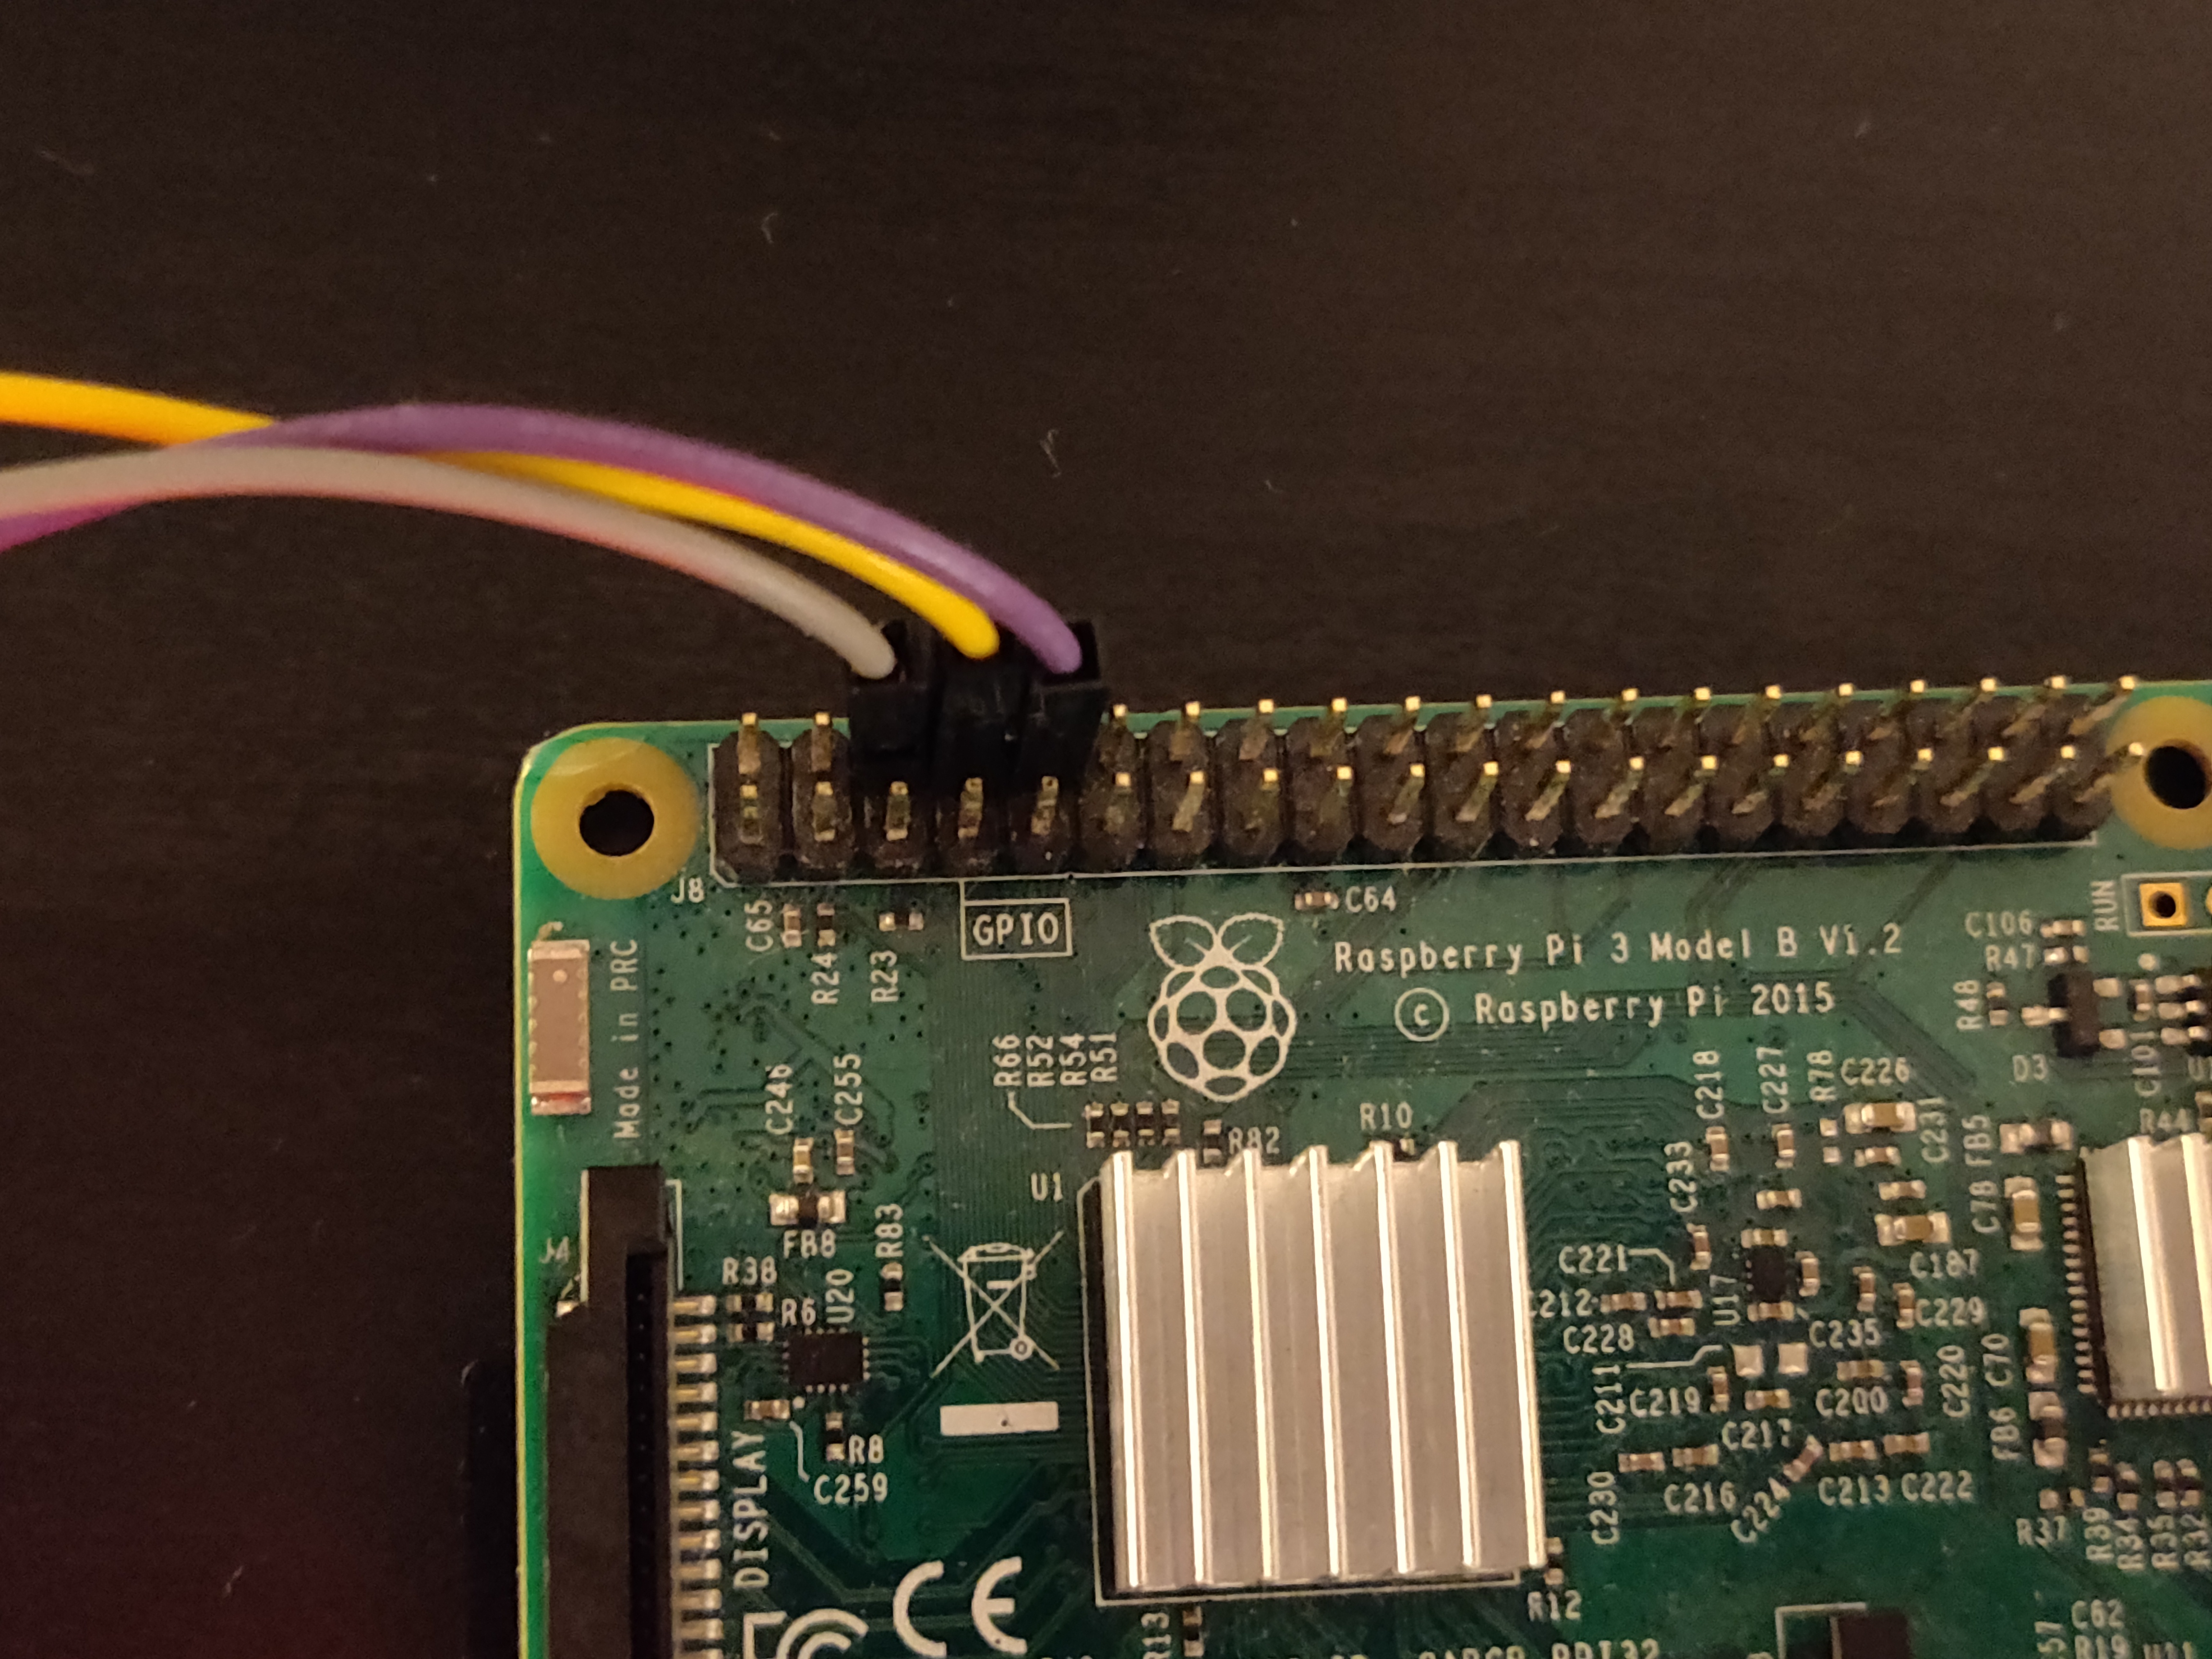
If you have a Serial Dongle or any UART device that can read the serial input you can skip this step. The RPi has a UART interface on the GPIO (pins 8 TX, 10 RX) with which you can communicate with the NAS. Before it can do that we have to enable those pins and disable its own console so it won’t interfere. sudo raspi-config -> 5 Interfacing Options -> P6 Serial -> No (for serial console) -> Yes (for serial hardware) should do the trick. Now reboot and you should be able to open a connection with minicom or screen and speed 115200 (sudo screen /dev/ttyS0 115200).
2. Connect to the serial interface
|  |
|  | | — | — |
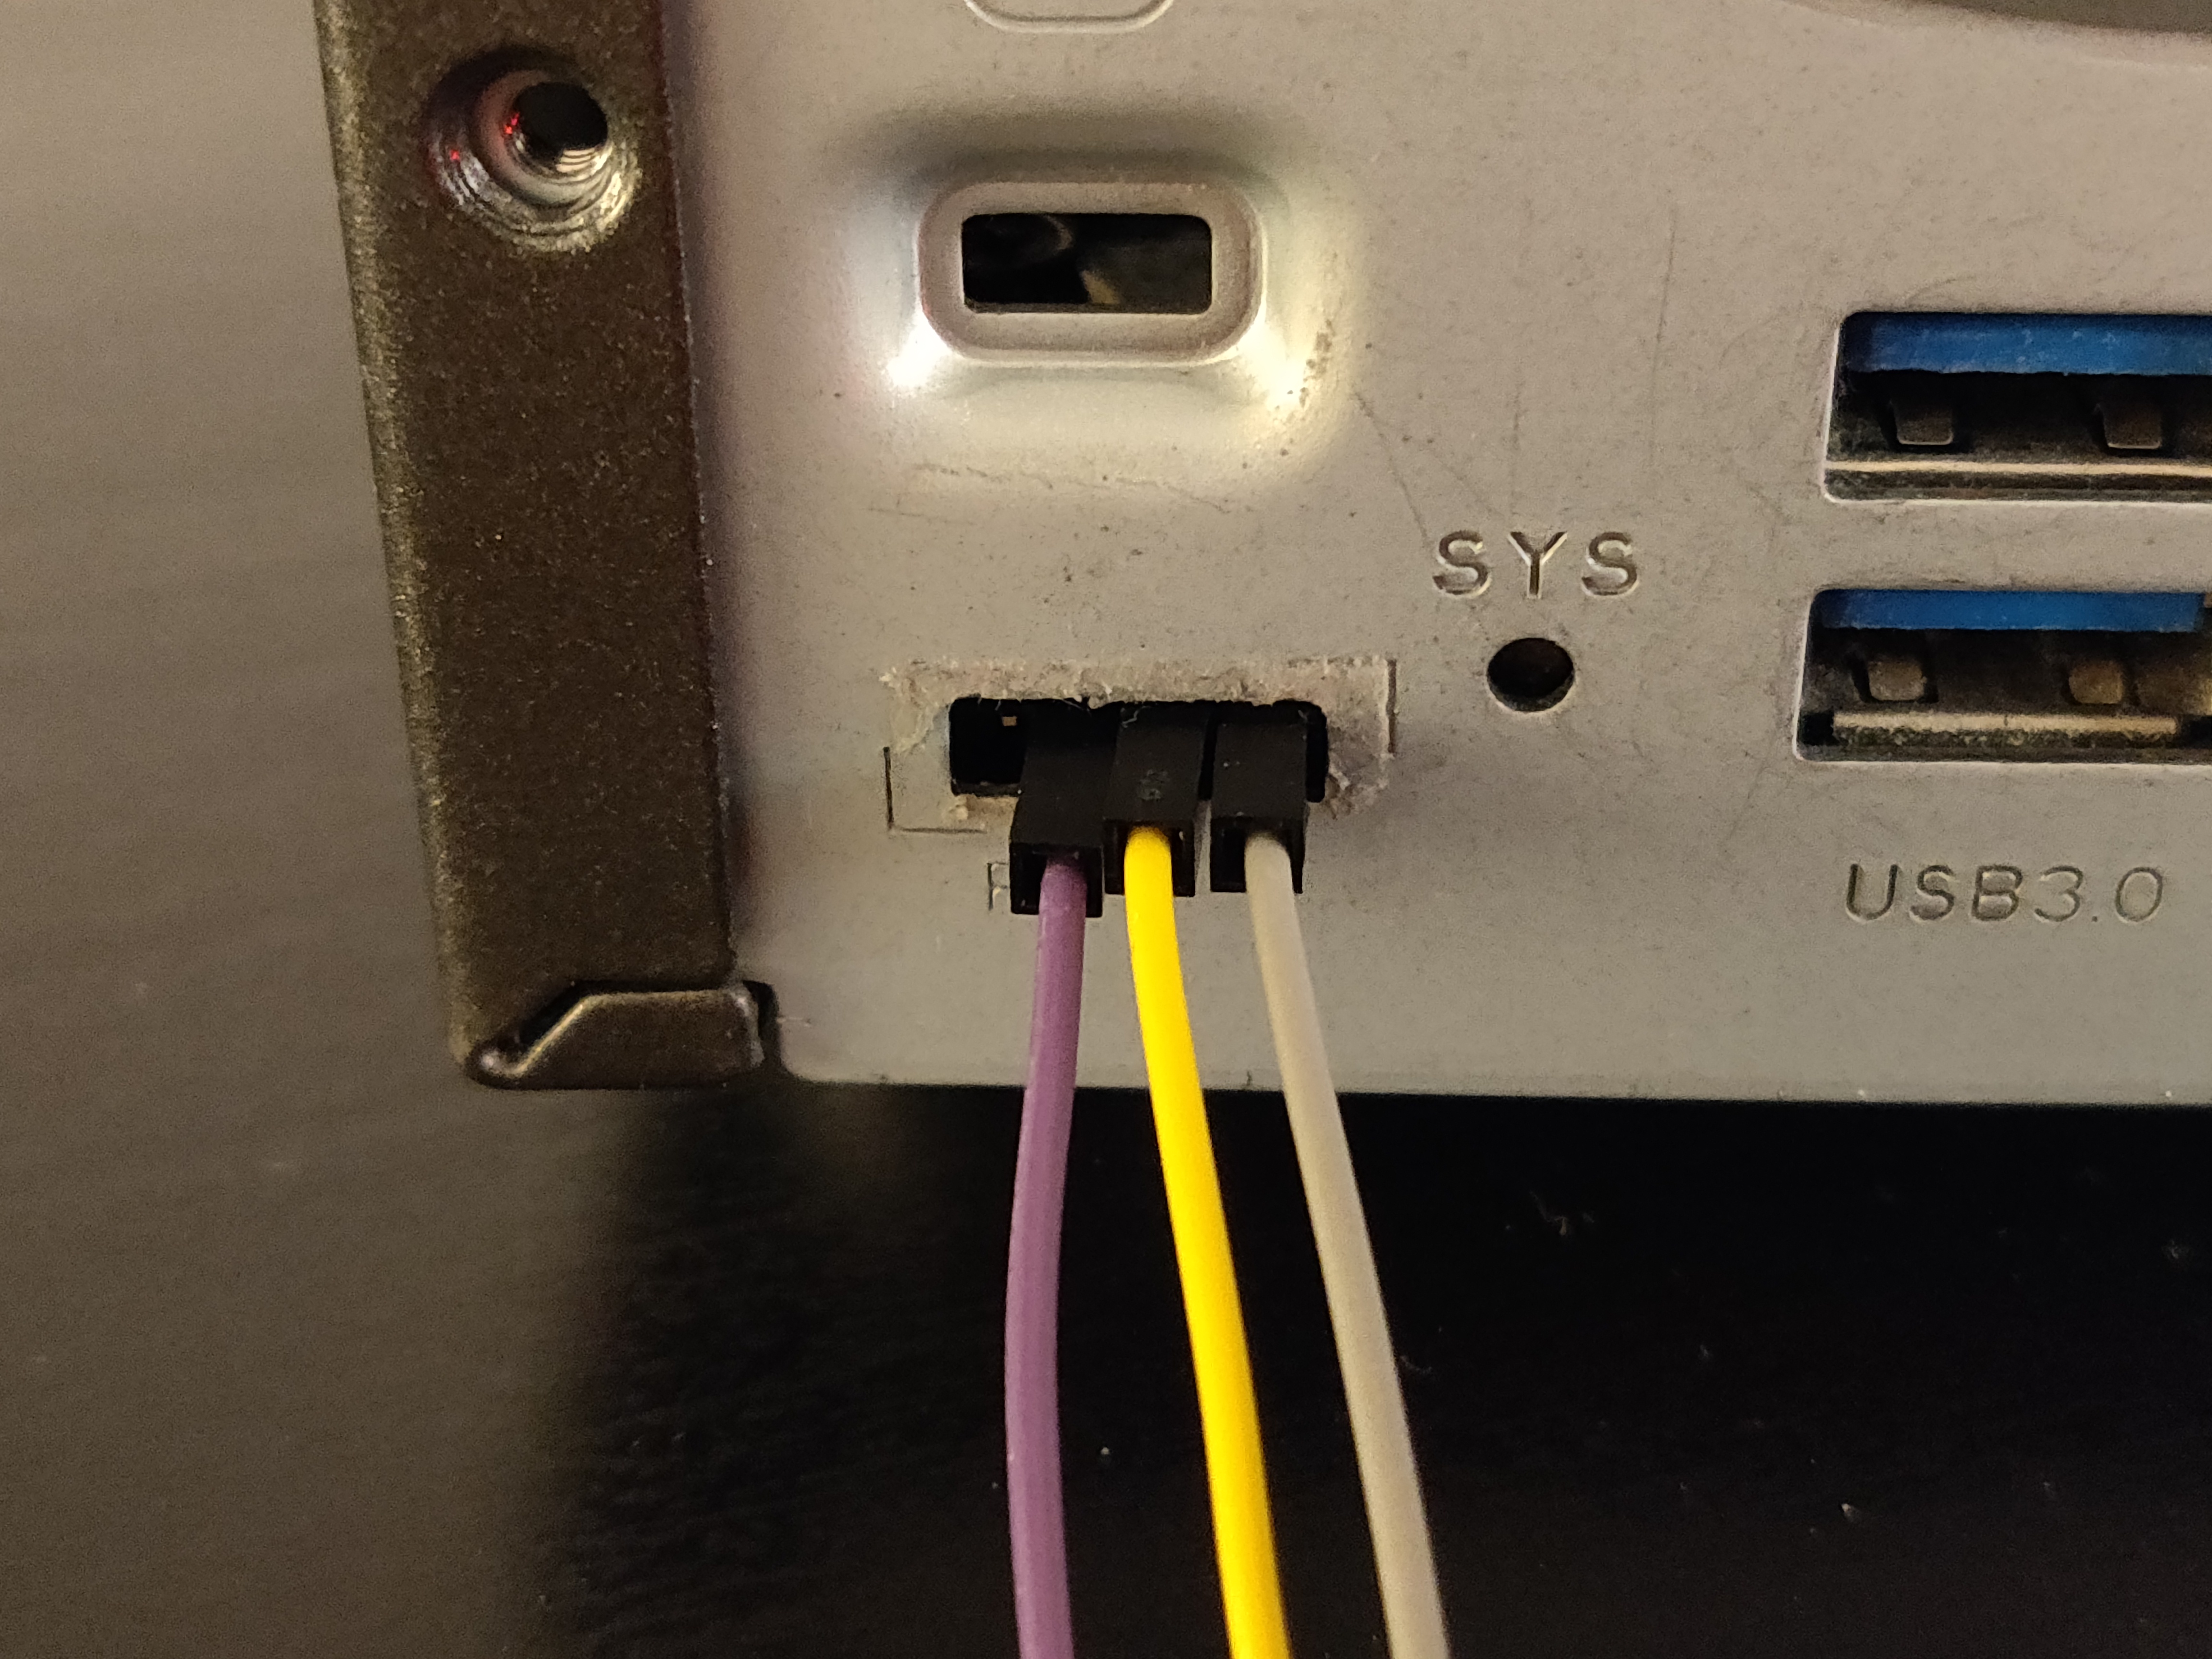
Remove the sticker from the backside of the NAS and connect TX->RX, RX->TX, GND->GND. When plugging in the power cable you should see something similar like this in the serial console:
1
2
3
4
5
6
7
8
9
10
11
12
13
14
15
16
17
18
19
20
21
22
23
24
25
26
27
28
29
30
31
32
33
34
35
36
37
38
39
         ____ _ _
        | \/ | ___ _____  _____ | | |
        | |\/| |/ _` | '__\ \ / / _ \ | |
        | | | | (_| | | \ V / __/ | |
        |_| |_|\ __,_|_| \_/ \___ |_|_|
 _ _ ____ _
| | | | | __)___ ___ | |_
| | | | ___| _ \ / _ \ / _ \|__ |
| |_| |___| |_) | (_) | (_) | |_
 \ ___/ |____ / \ ___/ \___ / \__|
 ** MARVELL BOARD: DB-88F6282A-BP LE

U-Boot 1.1.4 (Jun 29 2012 - 16:06:40) Marvell version: 3.4.27
Netgear version: Uboot-1_1_4-NetgearDUOV3-V1009

U-Boot code: 00600000 -> 0067FFF0 BSS: -> 006D0120

Soc: MV88F1155 Rev 1 (DDR3)
CPU running @ 1600Mhz L2 running @ 533Mhz
SysClock = 533Mhz , TClock = 200Mhz

DRAM unknown CAL tRP = 8 tRAS = 20 tRCD=8
DRAM CS[0] base 0x00000000 size 256MB
DRAM Total size 256MB 16bit width
Addresses 8M - 0M are saved for the U-Boot usage.
Mem malloc Initialization (8M - 7M): Done
NAND:128 MB
Flash: 0 kB

CPU : Marvell Feroceon (Rev 1)

Streaming disabled
Write allocate disabled


USB 0: host mode
PEX 0: PCI Express Root Complex Interface
PEX interface detected Link X1
Plug On and Power down, Please Switch On !
Turn it on and press a key in the serial console to stop the autoboot. Then you will see something like this:
1
2
3
4
5
Switch On !

Net: egiga0 [PRIME]
Hit any key to stop autoboot: 0
Marvell>>
3. Booting kernel and Debian installer
Build or download the latest kernel and the debian installer.
Put them both on an usb stick, plug it into the NAS’ front port and restart it with the whole procedure. Then find which USB port it is connected to with
1
2
usb start
usb storage
Now set the bootcmd to start from the usb and load the uImage to the location 0x1200000 and uInitrd to 0x2000000.
1
2
set bootcmd usb start\;fatload usb 0:1 0x1200000 /uImage\;fatload usb 0:1 0x2000000 /uInitrd\;bootm 0x1200000 0x2000000
boot
This actually sets the bootcommand to first start the usb interface then load the file from the usb device with the ID 0:1 into the RAM at the location 0x1200000 and 0x2000000. After that it tells the system where to find both the kernel and the init ramdisk. The boot command now starts the whole procedure.
Now you should get a screen like the following:
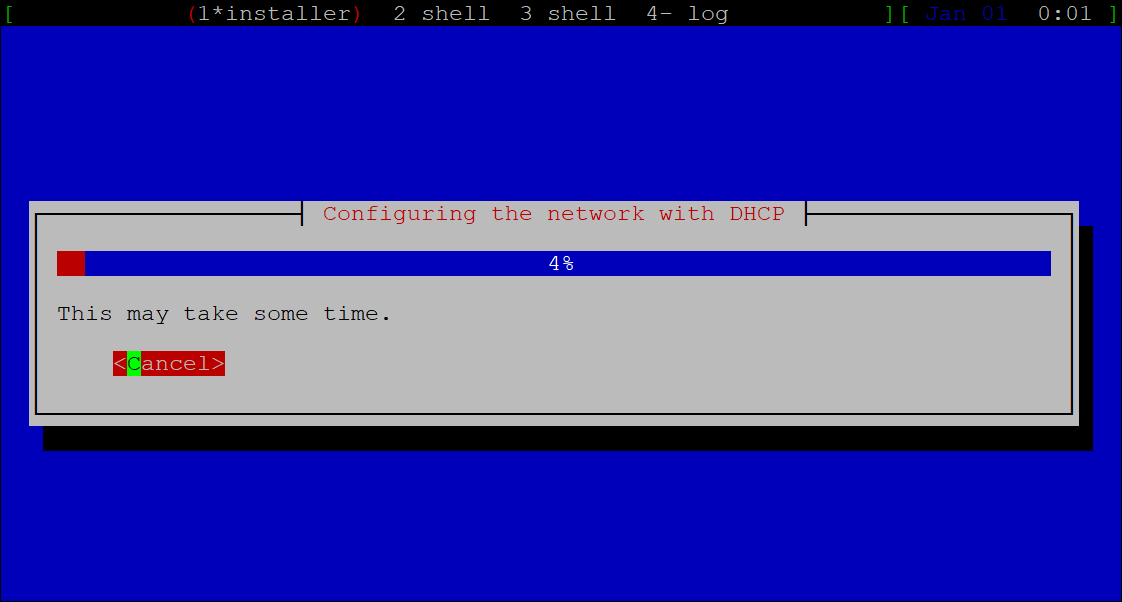
Set up debian as you normally would and select your desired install location. I picked the USB stick itself as the location for the main OS. Your USB stick should have at least 1 GB of storage and preferably should be sacrificable. Now, wait for the installation to finish.
EDIT:
If your NAS is still booting into its old system try to override the NAND flash with the new kernel + debian installer. e.g. load both from USB with the fatload command into the RAM as before (fatload usb 0:1 0x1200000 /uImage, …) then write it to the NAND at the appropriate location. You can find those locations by using the printenv command at the line bootargs (uImage is the kernel while initrd is the initial ramdisk). Now use something like nand write 0x1200000 0 LOCATION (replace LOCATION with the actual hex value) to write from the RAM to the NAND. The command has this structure: nand write from offset to.
Problems and troubleshooting
USB stick is not recognized
Plug it into the front USB port as this one is directly connected to the mainboard.
Try another USB stick as the NAS is very picky and some newer ones may not work with it.
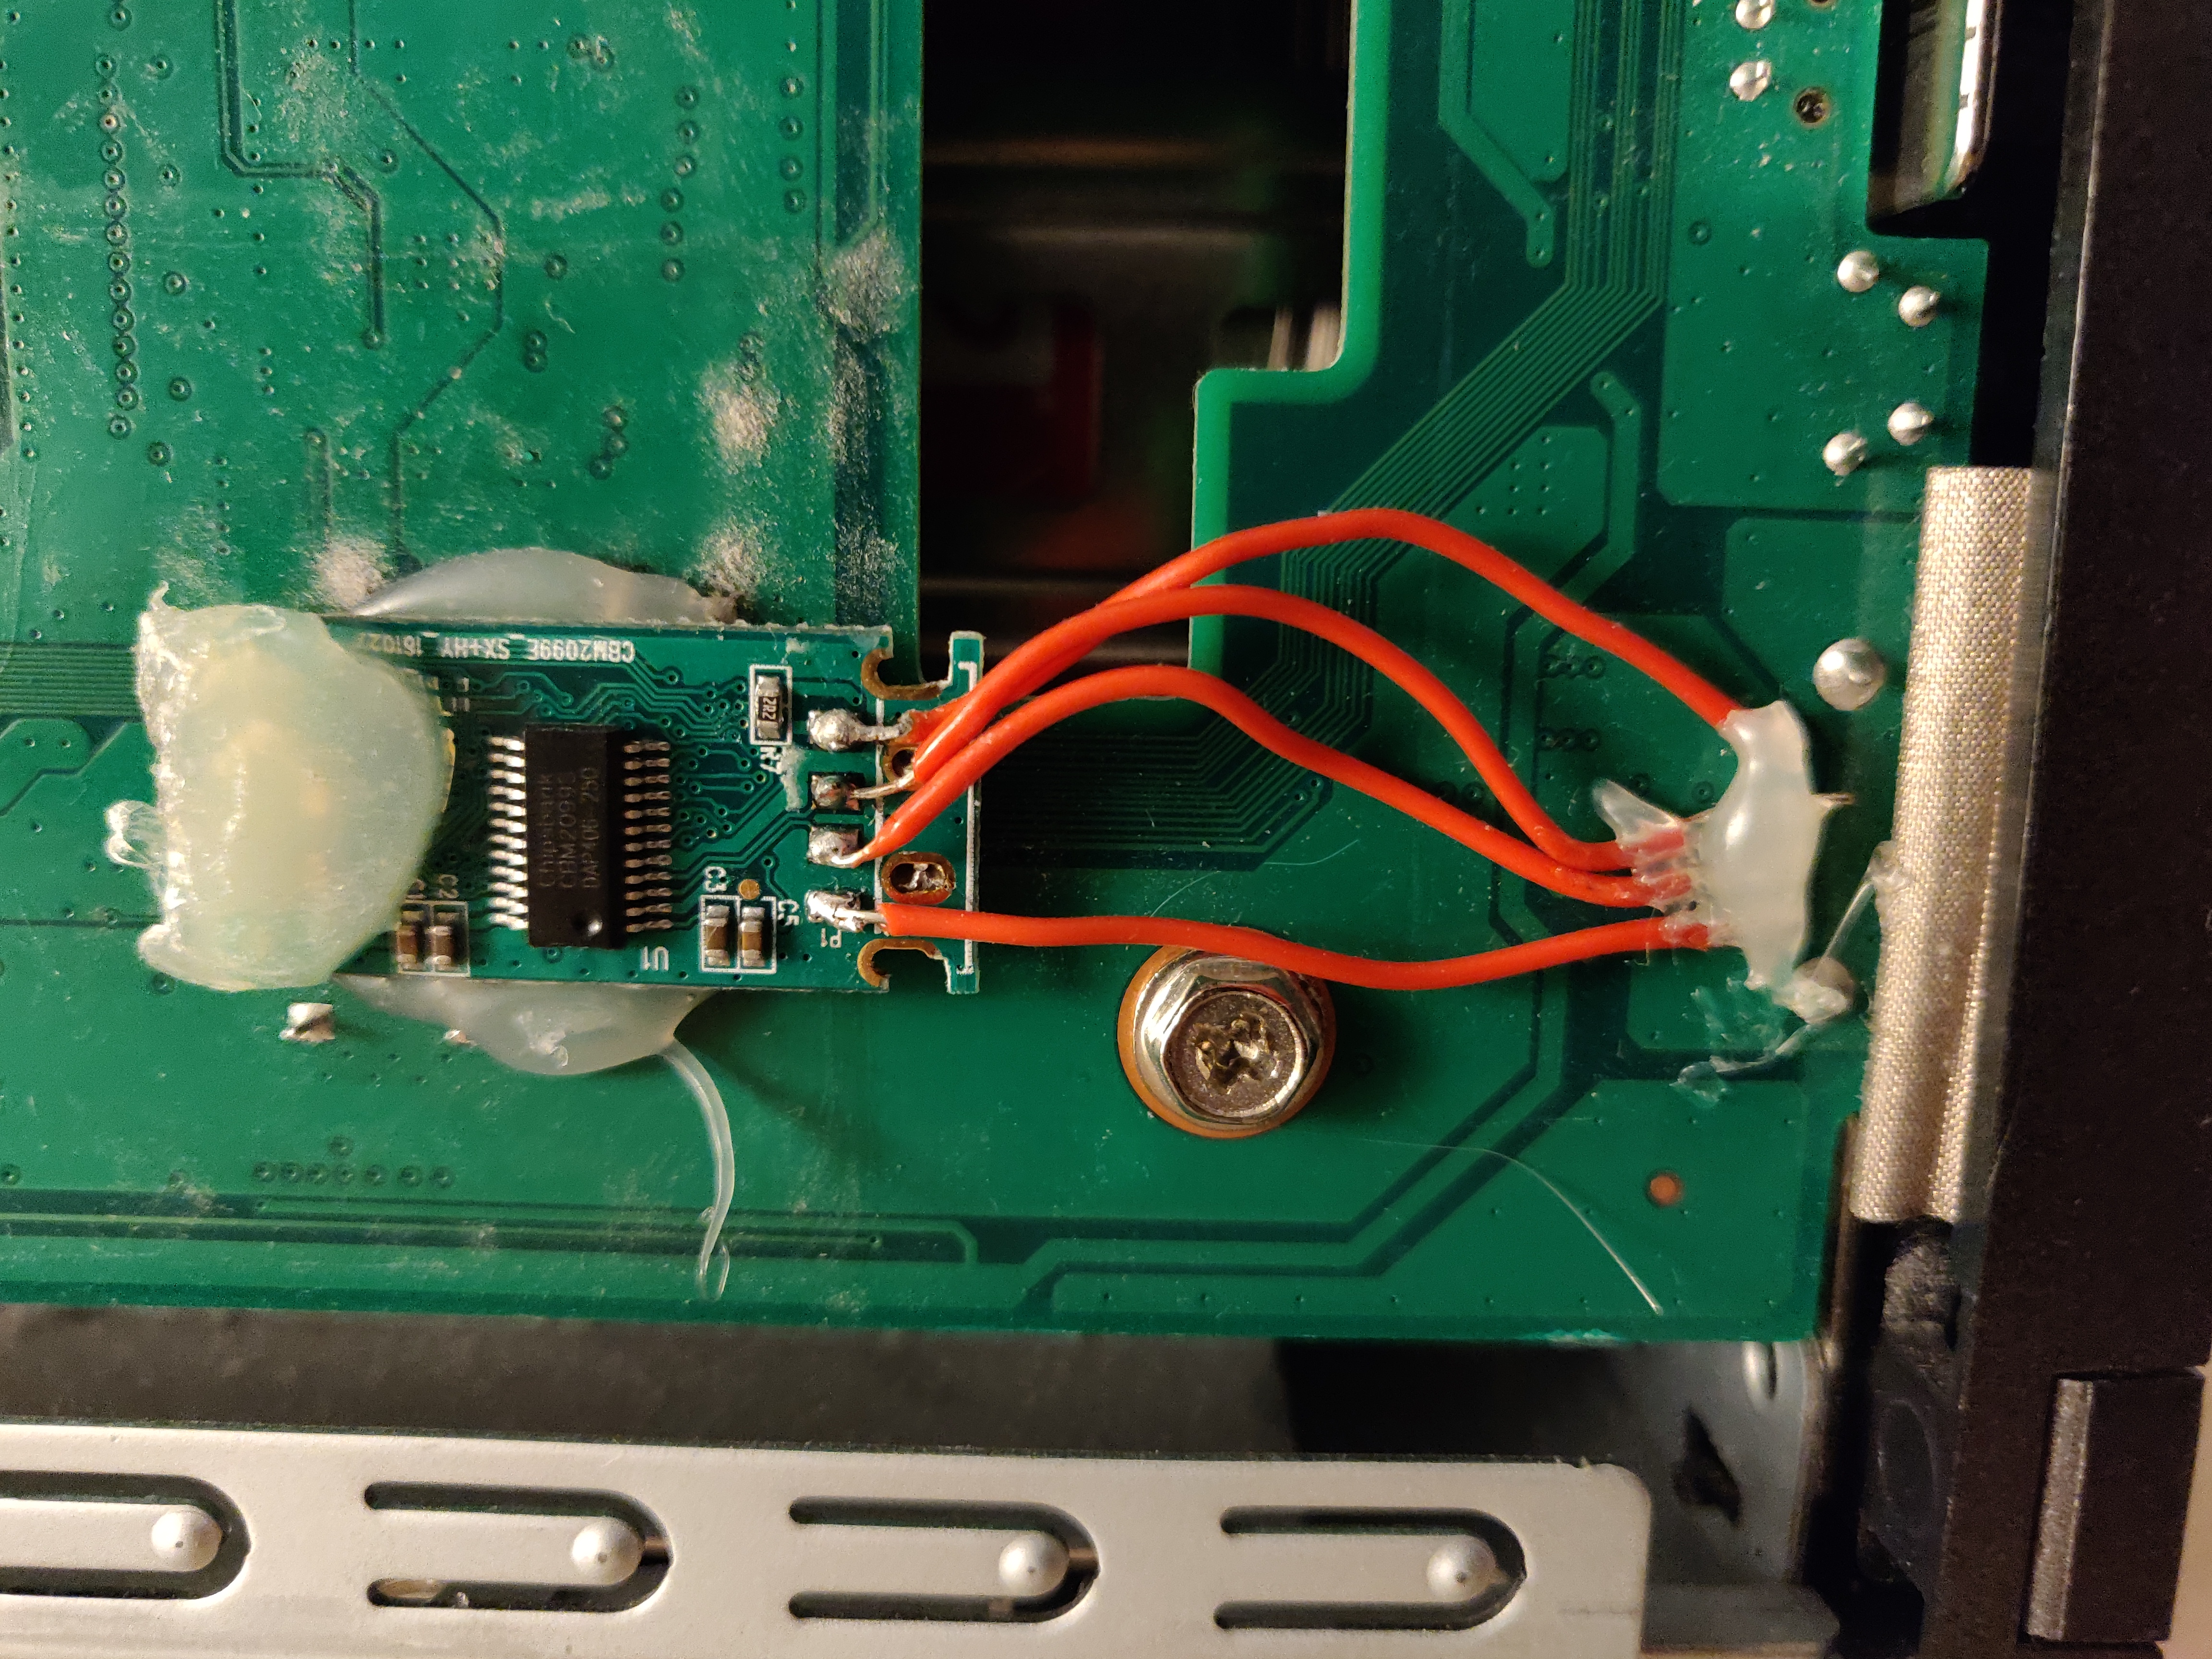
Make it cleaner
For esthetics, I directly soldered it to the board. In my case, it was a USB Stick 2.0 so I decided to attach it at the front USB to spare the two USB 3.0 ports on the back. I know, this is by far no perfect soldering and gluing job but it works.
Bricked device
If you still get an output on the serial port you might be able to unbrick the NAS with re-flashing the uboot image. Especially when you get stuck at Net: egiga0 [PRIME]. Get the latest uboot from the Netgear download site by extracting the RAIDiator file. Get kwboot (on Linux apt install u-boot-tools) and run kwboot -b uboot.bin -t /dev/ttyS0 -p (/dev/ttyS0 for RPi). Now turn the NAS on and it should boot the uboot image.
After that abort the boot process with any key, load the uboot image from e.g. USB and erase/write the NAND with the image. (be careful to not turn it off after erasing the NAND as this could lead to permanent damage)
1
2
3
fatload usb 0:1 0x2000000 /uboot
nand erase 0 0x180000
nand write 0x2000000 0 0x180000
Sources
Debian and upstream kernel on NETGEAR ReadyNAS Duo v2, http://natisbad.org/NAS/index.html (last visited Dec. 23, 2019).
How to unbrick the Netgear Ready NAS Duo v2, https://forum.doozan.com/read.php?3,74954 (last visited Dec. 27, 2019).
NV+ V2 stuck at booting, https://community.netgear.com/t5/Using-your-ReadyNAS-in-Business/NV-V2-stuck-at-booting/td-p/1008743 (last visited Dec. 28, 2019).